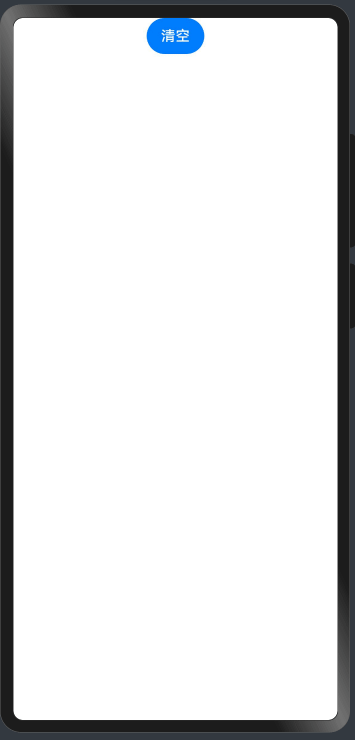
一、先上效果图:
二、上代码
1
2
3
4
5
6
7
8
9
10
11
12
13
14
15
16
17
18
19
20
21
22
23
24
25
26
27
28
29
30
31
32
33
34
35
36
37
38
39
40
41
42
43
44
45
46
47
48
49
50
51
52
53
54
55
56
57
58
59
60
61
62
63
64
65
66
67
| @Entry
@Component
struct Index {
@State pathCommands: string = '';
build() {
Column() {
Button("清空")
.onClick(() => {
this.pathCommands = '';
})
Flex() {
if (this.pathCommands != '') {
Path().commands(this.pathCommands).strokeWidth(5).fill('none').stroke(Color.Blue)
}
}.onTouch((event: TouchEvent) => {
this.onTouchEvent(event)
}).width('100%').height('100%')
}
}
onTouchEvent(event: TouchEvent) {
let x = vp2px(event.touches[0].x);
let y = vp2px(event.touches[0].y);
switch (event.type) {
case TouchType.Down:
this.pathCommands += 'M' + x + ' ' + y;
break;
case TouchType.Move:
this.pathCommands += 'L' + x + ' ' + y;
break;
default:
break;
}
}
}
|
在这个代码中,我们构建了一个手势绘图应用。以下是关键部分的解释:
@Entry和@Component注解: 这两个注解用于标识这个类是一个入口点并且是一个组件。在HarmonyOS中,这是定义页面的标准方式。
@State注解: 在HarmonyOS中,@State注解同样用于声明状态。在这里,我们声明了一个字符串类型的pathCommands,用于存储手势绘制的路径。
build()函数:这个函数定义了HarmonyOS页面的结构,包括清空按钮和用于展示绘图路径的组件。
onTouchEvent函数: 这个函数处理触摸事件,根据手指按下和移动的位置,将相应的绘制命令添加到路径中,实现了手势绘制的功能。